Auto-Create Jira via Salesforce
- Category : Automations
- Article Number : 11
- Publish Date: 24 Jun, 2024
Objective
-
To understand the importance of automation in Salesforce Jira integration such as one click escalation from Salesforce to the engineering team, or how to auto create Jira if needed.
Jira issues can be created automatically with the help of Process Builder or Apex Code/Triggers. We use the ‘Jira Field-Salesforce Field Mapping’ and ‘Default Values’—configured in Admin Settings (Field Configuration)—for the auto-creation of Jira issues. The Autolaunch Jira Creation Process can be done in three ways:
-
Firing an auto-create process using the Process Builder.
-
Automatic Jira issue creation using Apex Class/Trigger.
-
Auto-launching Jira creation process using Flow Builder.
-
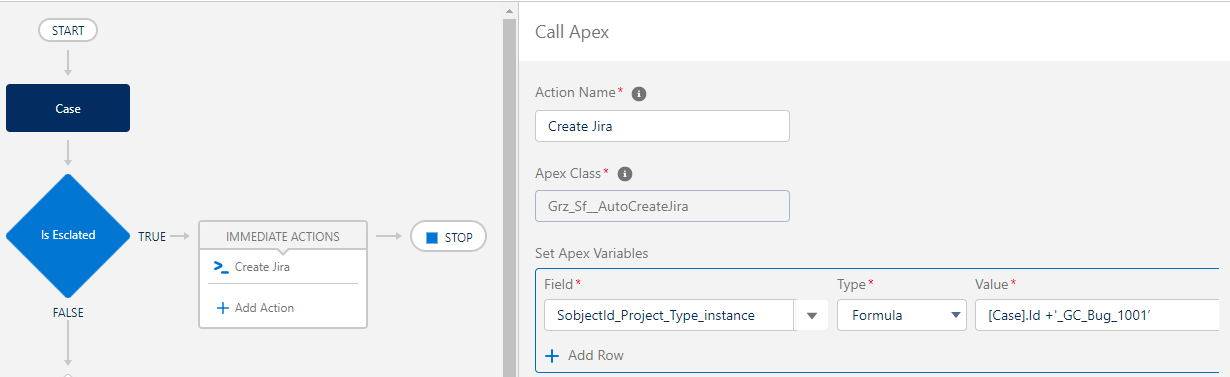
Firing an Auto-create Process Using the Process Builder.

-
Create a Process Builder using the appropriate Object and Launching criteria
-
Add criteria for when Jira should be created
-
Under immediate actions for your criteria, Click ‘Add Actions’
-
Select ‘Apex’ from the dropdown list
-
Name the action
-
Enter ‘Grz_Sf__AutoCreateJira’ in the Apex class
-
Set the Apex variables
-
Select ‘SobjectId_Project_Type_instance’
-
Select the formula type
-
Build a formula to get the outcome value in the following manner:
Formula Outcome: SobjectId_Project_Type_instance
-
“SobjectId” refers to the record Id through which a Jira issue should be created and linked.
-
“Project” refers to the key of the project for which a Jira issue needs to be created.
-
“Type” refers to the issue type.
-
“Instance” refers to the instance number.
Refer to the below example:5002w0000027IE8AAM_GC_Bug_1001
|
Note: Once you get all the needed information from the Salesforce record, you can build this using a formula in the Process Builder. |
|---|
-
Automatic Jira Issue Creation Using the Apex Class or Trigger
In your Apex class/trigger, use the Sinergify method to create Jira automatically. We have to pass specific parameters in the following method in order to create Jira successfully.
Find the details below:
// Method Name
Grz_Sf.AutoCreateJira.AutoCreateJira(List<String> SobjectDetail);
‘SobjectDetail’ will be the list of strings. Each element of the string should be in the following structure:
List<SobjectId_Project_Type_instance>
-
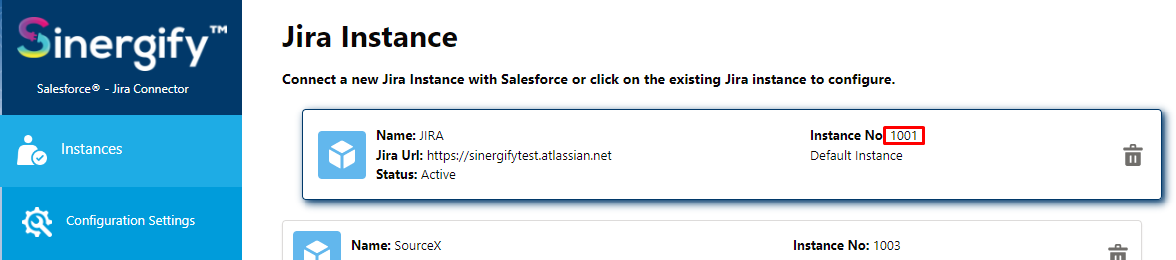
Select the App Launcher
-
Search for ”Admin Settings” to ring up the Admin Panel of “Sinergify”
-
Select “Instances”, to see the Instance details and respective Instance numbers

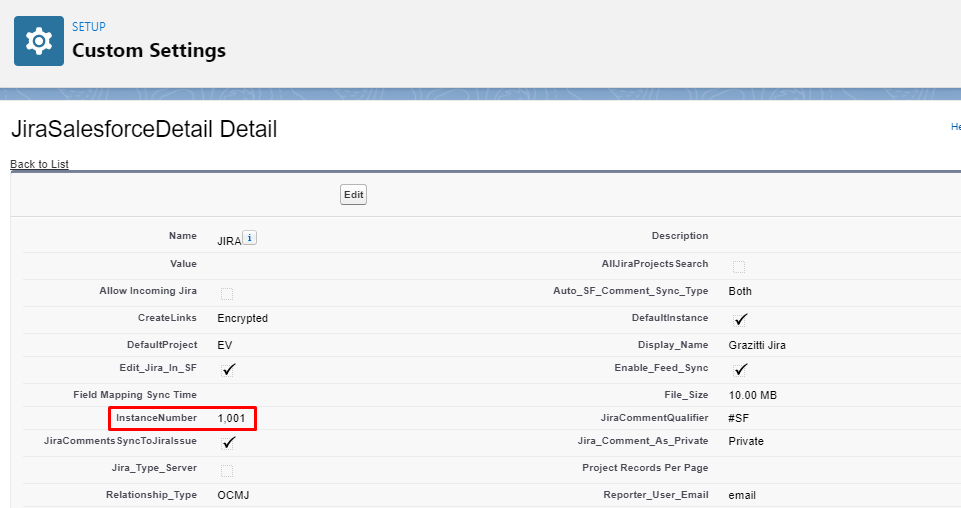
Get Instance Number (Classic User)
-
Click on Setup.
-
In the search box, type “Custom Settings”.
-
Look for JiraSalesforceDetails and click on “Manage” in front of it. This will list down all the configured Jira Instances.
-
Click on the required Jira Instance and look for the Instance number. This will provide you with the correct Instance number. See the image given below for reference.

-
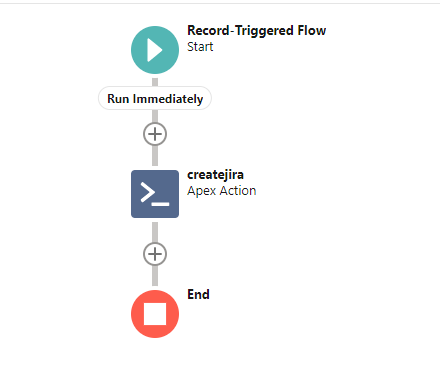
Autolaunching Jira creation process using Flow builder:
-
Log in to your Salesforce Org as an Admin.
-
From Setup, enter “Flows” into the Quick Find box, select Flows, and then click New Flow.
-
Select “Record Triggered Flow” from the available options.
-
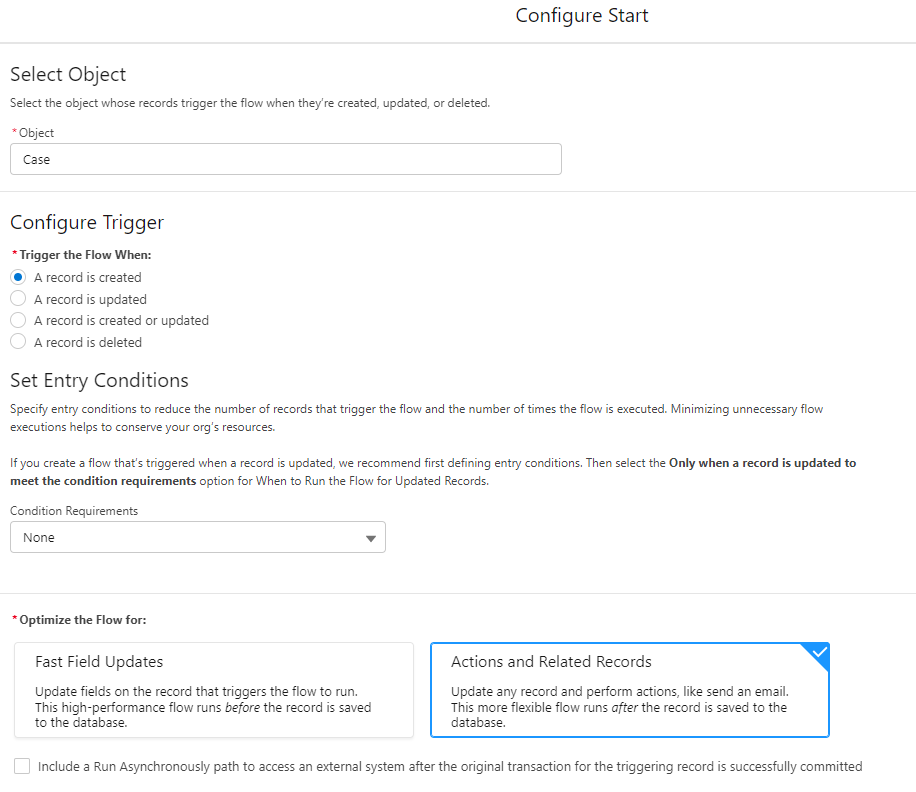
Under select “Object” whose records trigger the flow when they’re created, updated, or deleted.
-
Under Configure the flow select “A record is created”, Leave Set Entry conditions as “None”.
-
Under option Optimize the flow select “Action and Related Records”.
-
Click “Done”.
-
Click (+) Icon to add the “Action”.
-
Search for “Grz_Sf__AutoCreateJira”.
-
Fill the “label” and “Set input values” and Click “Done”.

-
The final flow will look like the below screenshot: