Notification Builder
- Category : Automation
- Article Number : 16
- Publish Date: 24 Jun, 2024
Objective
In Salesforce, there are multiple ways to notify users of any activity or field updates. This document will help you configure notifications based on any update or activity w.r.t. Jira fields via the Notifications Bell within Salesforce.
For example, to help keep better track of status updates on Jira issues for increased productivity and faster overall SLAs, we can notify the case owner based on a Jira status update.
Solution
Send Bell notifications to Salesforce Case Owner based on any field Updates on the linked Jira Issue. We will be using the Jira Status field as an example.
Pre Requisites
-
Creating a Custom Notification record
-
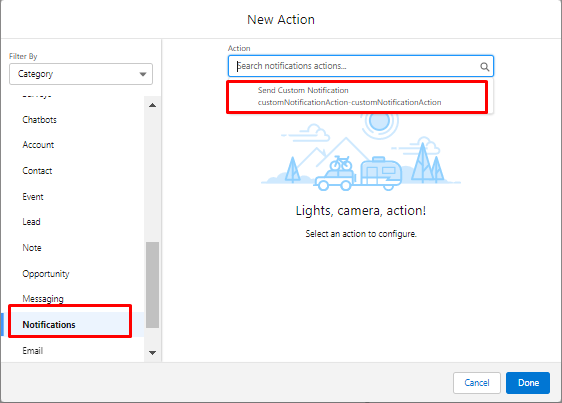
Go to Setup> Notification Builder > Custom Notifications.
-
Click New.
-
Provide a Name and Desired Channels and Save the record. In addition to this, you can also use your own. We have used Sinergify Bell Notification.

-

|
Points to remember for later reference 1. Name of the Custom Notification: ’Sinergify Bell Notification’. 2. API Name: ’Sinergify Bell‘. |
2. Creating resources to use later
|
S.No |
Resources |
DataType |
|
Record Collection Variable |
||
|---|---|---|
|
A |
ListofcaseRelationships |
Record(Jira issue Object) |
|
Collection variable |
||
|
B |
EmptylistDefault |
Text |
|
C |
Recipent |
Text |
|
Variable |
||
|
D |
CaseNumber |
Text |
Flow Creation and Implementation
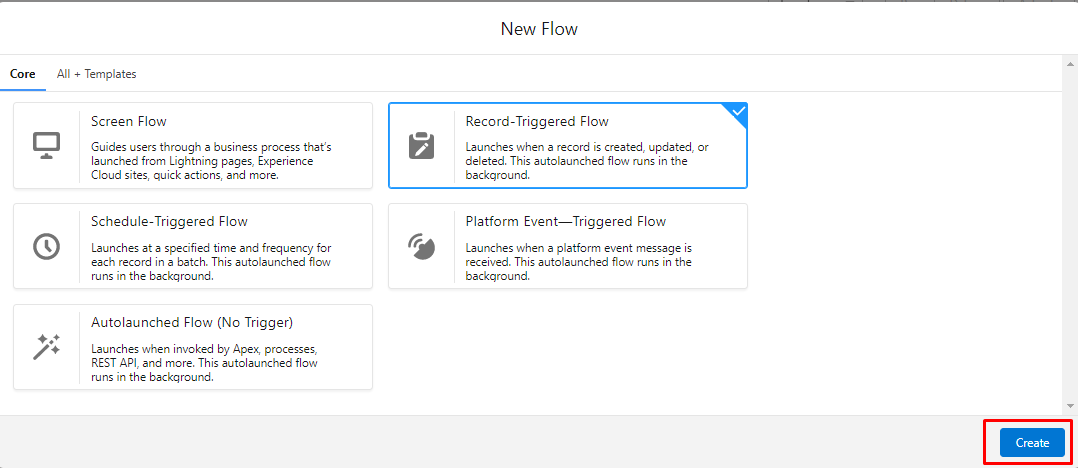
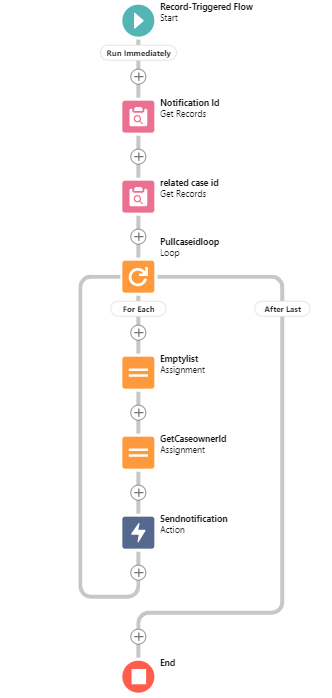
Step 1. Choose the record-triggered flow and click "Done." Record-triggered flow launches when a record is created, updated, or deleted. This auto-launched flow runs in the background.
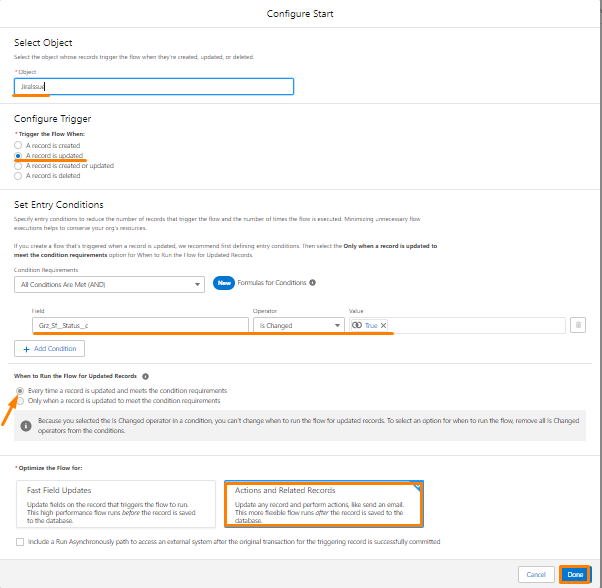
Step 2. Once you choose the flow, Select the Jira issue object and configure which event this flow should execute, choose the “A record is updated” option. Specify entry conditions to reduce the number of records that trigger the flow and the number of times the flow is executed. Minimizing unnecessary flow executions helps to conserve your organization’s resources. Fill in all the details then click “ Done”.
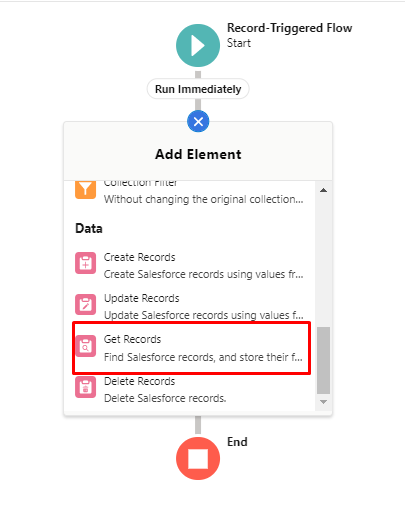
Step 3. Click on the (+) icon and select "Get Record." It will automatically store all the record values in a flow variable. When the flow moves to the next element, the values are assigned to the variable. Complete the process by clicking "Done."
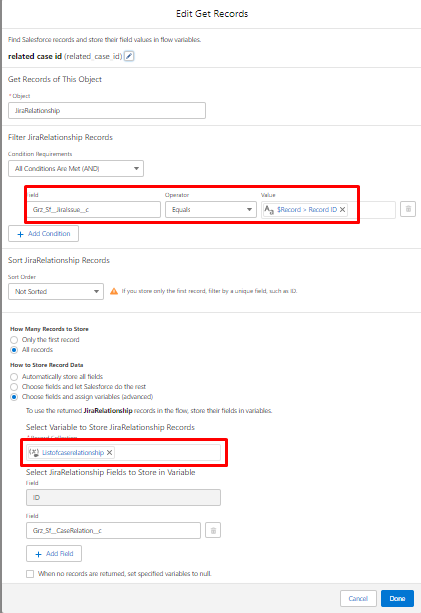
Step 4. Now again Click on the (+) icon and select the ‘Get Record‘. Through this get record, you can get the records of the Jira Relationship object. Jira Relationship object is used to retrieve all the associated Salesforce object records for a particular issue. Complete the record details and click "Done".
Resources
-
Listofcaserelationship
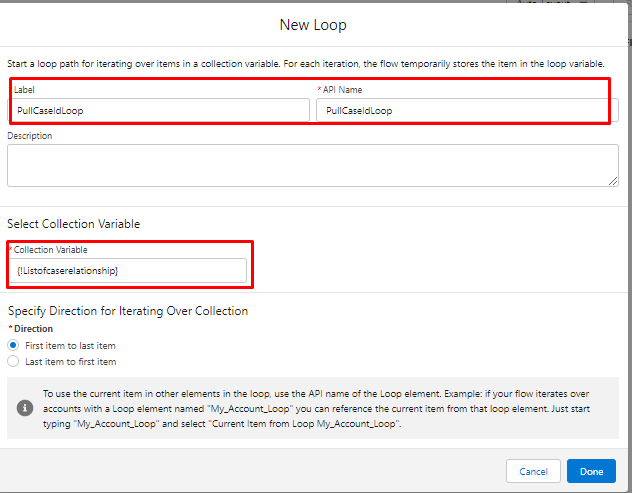
Step 5. Click on the (+) icon and select the "for loop." The for loop is used for the iteration of each case record. It is used to pull the IDs.
Resources
-
Listofcaserelationship
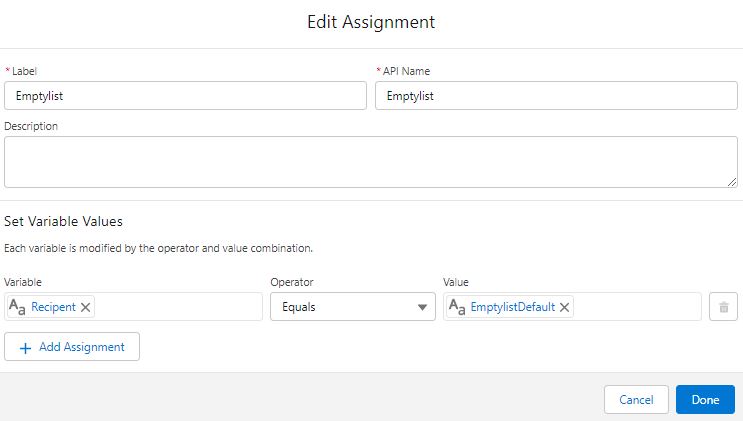
Step 6. Click on the (+) icon and select the "Assignment" element and name it "Empty list." In this empty list, set the value of "Recipient." Complete the details and click "Done."
Resources
-
Recipient
-
EmptylistDefault
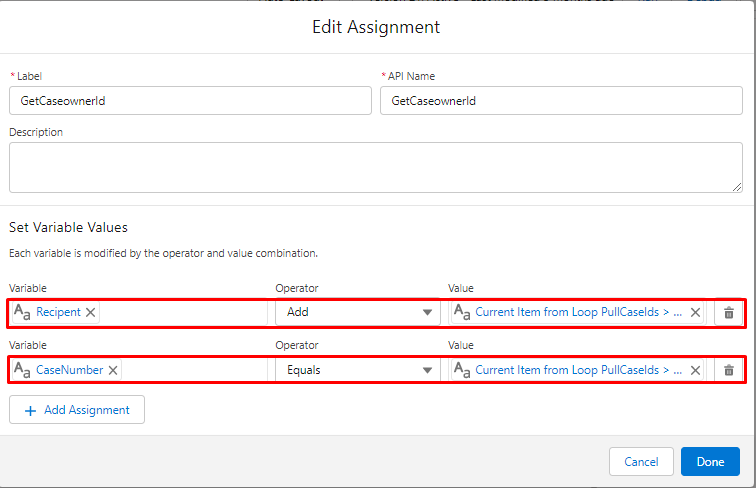
Step 7. Select "Assignment" after clicking the + icon. This assignment is used to fetch the case owner's ID. Once you are done, click "Save."
Resources
-
Recipient
-
Case Number
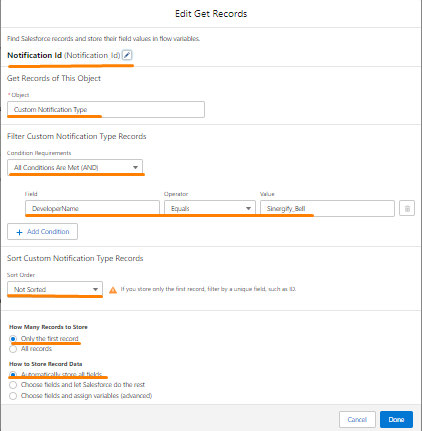
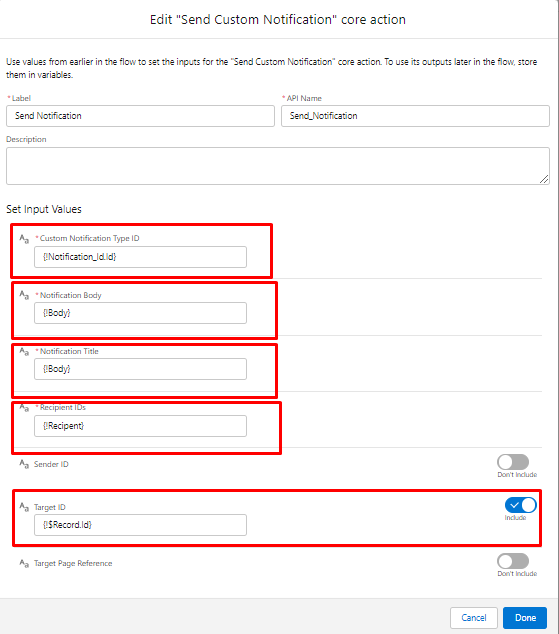
Step 8. Click on the (+) icon and select the "Action" element. Search "custom notification" in the action search box and select "Send Custom Notification," which we have created in the pre-requisites.Once done Click “Done”.Fill in the values to use its outputs later in the flow, store them in variables.
-
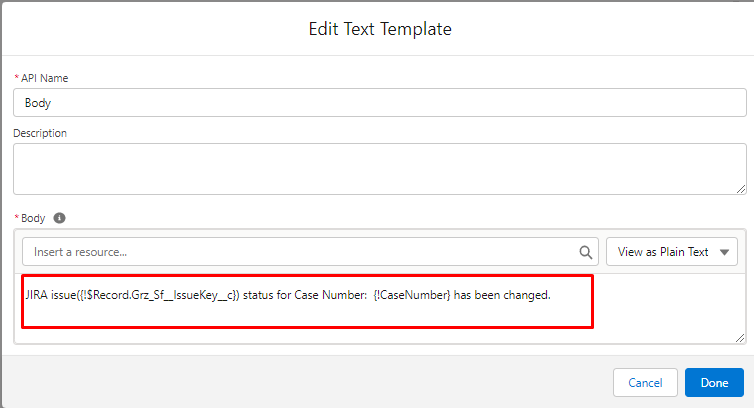
Body: JIRA issue({!$Record.Grz_Sf__IssueKey__c}) status for Case Number: {!CaseNumber} has been changed.
Step 8. The final flow will look like the below screenshot:
Step 9. The Case owner will be notified whenever the status of the 'Jira issue' Object changes.

Step 10. If the above article was not able to resolve your usecase kindly raise a ticket to our Support via https://www.sinergify.com/support-portal/ or via email [email protected]
