Migrate Legacy Jira Records
- Category : General
- Article Number : 21
- Publish Date: 24 Jun, 2024
Objective
To understand the steps involved during the migration of Legacy Jira records into Sinergify and ensure a smoother data migration process.
Solution
To migrate legacy Jira records, please follow these steps:
Step 1. Create a new CSV File.
Create a new CSV file that will hold the data you want to migrate.
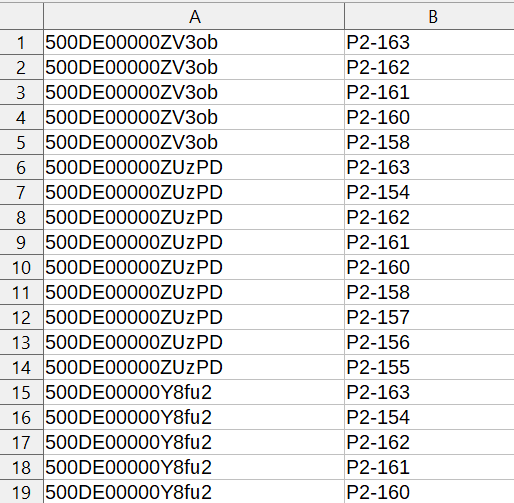
Step 2. Add Columns for Data Mapping.
Add two columns to the CSV file to store 'Case record ID' and 'Jira Issue Key' data. These columns will help map the Jira records to Sinergify records. See the screenshot below:
Step 3. Sort the CSV file.
Sort the CSV file based on the 'Jira Issue Key' column in ascending order (A-Z). Sorting will help streamline the migration process.
Step 4. Bifurcate Large Files.
If your CSV file contains more than 5000 records, split it into multiple files, each containing a maximum of 5000 records. This step is to manage large data sets efficiently.
Step 5. Upload Files to Salesforce.
Download all the sheets in CSV format and upload them into Salesforce Files. This step is essential for managing and processing the data within Salesforce.
Step 6. Get Salesforce Content Document IDs.
After uploading the files to Salesforce, obtain the Salesforce content document IDs of the uploaded files. These IDs typically start with '069'. You will use these IDs in the migration process.
Step 7. Run the migration script.
Open the Anonymous window from the Developer Console of your Salesforce org. Execute the following script for each uploaded file. This script initiates the migration process.
Script :
Grz_sf.MigrationBatchForJiraIssue mg = new Grz_sf.MigrationBatchForJiraIssue(ContentDocumentId,InstanceNumber,CreateRelation) ;

 Database.executeBatch(mg, 50);
Values :
|
|---|
|
Note: We recommend to first follow and confirm the process in any sandbox before running the process in Production. |
|---|
Step 8. Click Execute
Execute the migration script for each uploaded file by pressing the "Execute" button in the Developer Console.
Step 9. Repeat for each CSV file
Repeat for each CSV file you uploaded in step 5. This ensures that all your Jira records are migrated into Sinergify.
